WARM UPS
Do not overstretch muscles when cold. Cold stretches should follow after a 2 minute run in place. Deep stretching should only be done once muscles are warm. The best time to do so is after completing upper and lower body charts.
Leg Stretches
standing or sitting
-
Touch Toes, legs straight
-
Touch Ground, legs apart
-
Touch Toes, legs apart
Primitive Squat – Standing
Butterfly Stretch - Sitting
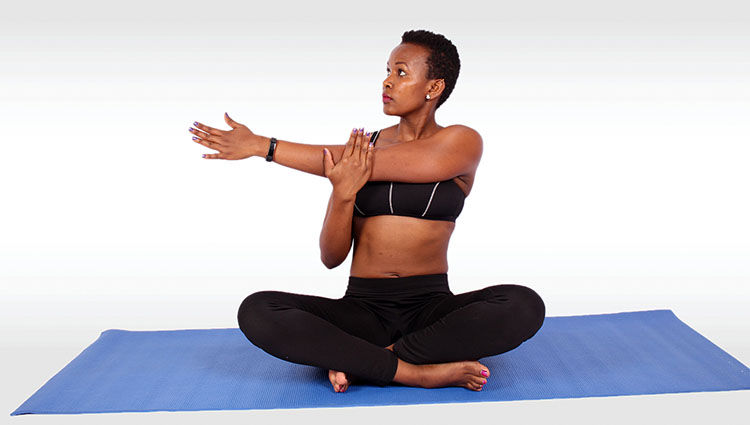
Arm and Hand Stretches – see photos


Translation of Short Hand Abbreviations
RH = right hand
RFA = right forearm
RF = right foot
RL = right leg
LH = left hand
LFA = left forearm
LF = left foot
LL = left leg


RFF = Right Foot Forward
RFB = Right Foot Back
RFS = Right Foot Stationary
LFF = Left Foot Forward
LFB = Left Foot Back
LFS = Left Foot Stationary
UPPER BODY CHARTS
All Charts 1- 26 are preformed starting from a Ready Stance moving into a Seisan Stance.
Charts 27 and 28 are preformed starting from a Ready Stance moving into a T Stance.
1. RFF RH Straight Punch
2. LFF LH Straight Punch
3. RFF RH Uppercut
4. LFF LH Uppercut
5. RFF LH Reverse Punch
6. LFF RH Reverse Punch
7. RFB LH Leg Block – RH Punch
8. LFB RH Leg Block – LH Punch
9. RFB LH Side Block – RH Punch
10. LFB RH Side Block – LH Punch
11. RFB LH Head Block – RH Punch
12. LFB RH Head Block – LH Punch
13. RFB LH Open Side Block – RH Nukite
14. LFB RH Open Side Block – LH Nukite
15. RFB LH Open Arc Sweep – RH Uppercut
16. LFB RH Open Arc Sweep – LH Uppercut
17. RFB LH Bridge of Nose – RH Punch
18. LFB RH Bridge of Nose – LH Punch
19. RFF RH Leg Block – 5 Punches
20. LFF LH Leg Block – 5 Punches
21. RFF RH Side Block – 5 Punches
22. LFF LH Side Block – 5 Punches
23. LFF LH Shuto –Followed by a RH Shuto
24. RFF RH Shuto – Followed by a LF Shuto
25. LFF RFA Elbow Strikes – Followed by a LFA Elbow Strike
26. RFF LFA Elbow Strikes – Followed by a RFA Elbow Strike
27. LFB T-stance LFA Throat Block with Right Elbow Strike to the rear
28. RFB T-stance RFA Throat Block with Left Elbow Strike to the rear
LOWER BODY CHARTS
All Charts that are FF or FB are preformed starting from Ready Stance moving to a Seisan Stance.
All Charts that are FS start from a Ready Stance and pivot into the performance of the technique. these transition into the T-Stance, the Crane Stance, or remain in a Ready Stance.
1. RFF LL Straight Kick
2. LFF RL Straight Kick
3. RFF LL Reverse Kick
4. LFF RL Reverse Kick
5. RFS LF Cross Kick
6. LFS RF Cross Kick
7. RFS LL Knee Kick
8. LFS RL Knee Kick
9. RFS LL Side kick-Heel & Edge of Foot
10. LFS RL Side kick-Heel & Edge of Foot
11. RFS LL Side Kick – Ball of Foot
12. LFS RL Side Kick – Ball of Foot
13. RFS LF Forward on Angle Kick – snap
14. LFS RF Forward on Angle Kick – snap
15. RFS LF Forward on Angle Kick – thrust
16. LFS RL Forward on Angle Kick – thrust
17. LL Step to side (squat to side) Side and RL Kick Forward
18. RL Step to side (squat to side) Side and LL Kick Forward
19. RLS LL Heel Push Kick
20. LLS RL Heel Push Kick
21. Push-ups on Knuckles
22. Push-ups Military Standard
23. Dips - triceps
24. Ready Stance – side twists with relaxed swinging arms left to right
25. Breathing – lifting open hand up when inhaling and down when exhaling
26. Bend Back – hands on lower back palms out and exhale 5 times; stand up and repeat 5 times.
27. LH Grab Right Heel RH Push Right Knee Down while standing on LF.
28. RH Grab Left Heal LH Push Left Knee Down while standing on RF.